
Ultrasound 101 – Part 8: Artifacts in Ultrasound

Welcome to Ultrasound 101. In this 12-part series, we will talk about the basic principles of medical ultrasound, the equipment you will use, the settings on your machine, and of course, how to use sonography in your patients. Each part will focus on a specific topic and allow you to experiment with the scanner, adjust the settings on your machine, and get the best out of your ultrasound examination.
Last time, you learned how the B-Mode image is calculated and why some things are dark and others are bright. We briefly mentioned artifacts, and because this is such an essential topic in ultrasound imaging, we decided to dedicate a whole part to it. So today, you will learn why not all things on your scanner’s image are as they seem. Now let’s get started!
What is an artifact?
An artifact is something that you see on the ultrasound image which is either not really there, is in another place in reality, or looks different than it actually is. This happens because the ultrasound image builds upon certain physical assumptions. One assumption is that where there is no echo, there is no structure; another would be that echoes that take longer to travel back to the transducer originate further away from it. Artifacts can hinder our view of the area of interest, fool us into thinking there is a pathology, or make measurements more difficult. Thus, every sonographer must know about and recognize the most important artifacts. You will now learn about acoustic shadowing, acoustic enhancement, mirror- or reverberation artifacts, and near-field clutter. Remember our dark attic from last time? We will revisit it today and again use a flashlight to see into it. The flashlight’s beam shall illustrate the ultrasound beam we send into the patient’s body.
Acoustic shadowing
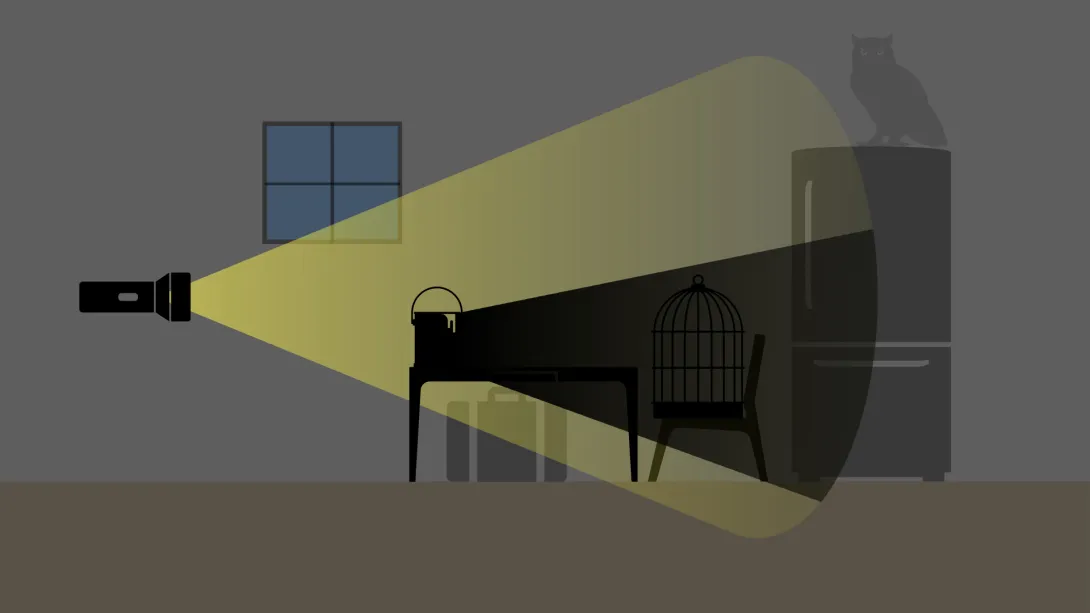
As you know, ultrasound waves must travel through several layers of tissue to allow us a view of deep structures. When something very hard is in the way, like a bone, the ultrasound beam can’t travel through but gets reflected by it completely. As a result, we cannot see into the body in this specific area - the bone casts a shadow. Likewise, when our flashlight hits a solid object in the dark attic - say, a bucket of paint - we can see this object’s (proximal) surface clearly, but we won’t see through it. It will also cast a shadow onto the objects behind (distal to) it. Much like behind the bucket in our attic, there are dark areas on the ultrasound screen behind solid structures such as bones. We call this acoustic shadowing.
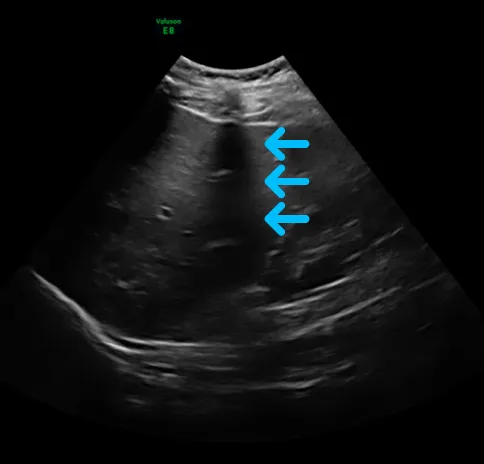
Look at this image of the liver - you can see a dark strip down the middle, marked by the arrows, where you can hardly see any liver tissue. This is acoustic shadowing. You’ll notice that the shadow isn’t all black in this image, and you can see some echoes in the far field. This is because of sound waves traveling left and right of the obstacle which get reflected all over the area.
While this is mostly not desired in imaging, and we usually try to find a way around these shadowing objects (so-called barriers to ultrasound) to get a look behind them, it is actually very helpful in some situations: acoustic shadowing behind the gallbladder can be a sign towards gallstones, some of which might be too small to be seen directly. It also appears in severe calcifications in vessels and on heart valves when the plaque is very hard, for example. We can see it with stents, mechanical valves, and other artificial implants the patient might have.
Dorsal acoustic enhancement
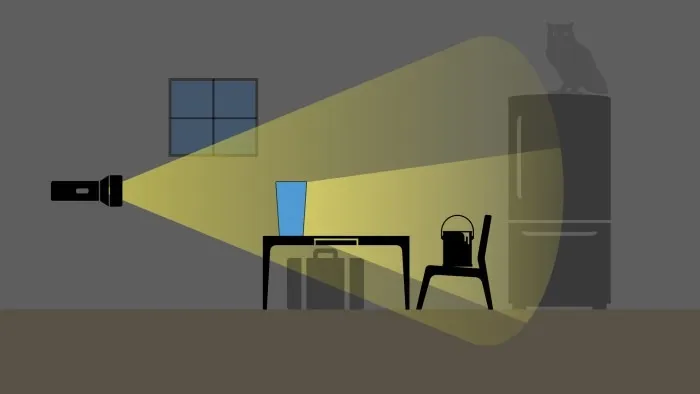
On the other hand, there are areas in the body that can enhance our view, and we mentioned them in part 6: these are called acoustic windows. Areas like the liver, the spleen, or a filled urinary bladder allow the ultrasound beam to travel through easily and even increase echoes in the far field. Getting back to our flashlight in the attic, one might compare this to a clear water tank: you can see through it, and brightness is even increased in the far field.
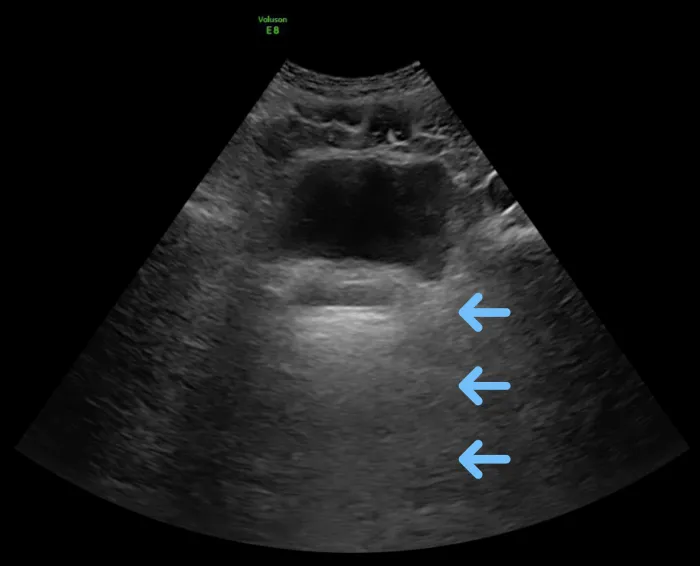
Look at this image of the urinary bladder: you can see that the area behind the bladder, marked by the arrows, is brighter than the area to the left and right. This is acoustic enhancement due to the fluid in the urinary bladder and does not mean there are any hyperechoic structures behind it, as one might think at first glance.
As with acoustic shadowing, acoustic enhancement can be helpful to spot pathologies: acoustic enhancement in areas where you would not expect it is often a sign for free fluid, like in ascites - you can see the fluid itself, but you can also see the bowl much more clearly than usual, swimming in the fluid (if there is enough fluid). Another example would be the spine sign, which means the spine can be seen through a pleural effusion.
Reverberation and mirroring artifacts
This artifact is a little more tricky to understand than the others. Reverberation is when the ultrasound wave hits a very reflective surface, like the pleura, gets echoed back to the transducer, but bounces off from the transducer’s surface again and thus goes back into the tissue. It then hits the pleura again and gets reflected back to the transducer, which picks it up as an echo. Because it went back and forth twice, the machine thinks the echo took double the time to come back - concluding that the echo must originate in double the depth, which is shown on your screen. This usually happens not only twice but several times, the echo getting weaker each time. The result is the actual pleura being displayed once in its correct position - right below the ribs - and a second, third, and so on time in increasing depth (and decreasing echogenicity). This phenomenon can occur not only through reflection from the transducer’s surface but from any highly reflective surface.
A mirror artifact is quite similar physically, but the echo in question is reflected not by the transducer but by the mirrored object itself, creating two echoes of a structure that only exists once. A classic example is a liver cyst being mirrored by the diaphragm and thus showing up once above and once below the diaphragm on your screen. As with a mirror on your bathroom wall, the image you can see depends on your angle of looking at it - the angle of insonation in ultrasound - so you can easily debunk this artifact by moving your transducer around a bit. Try to get several views on the structure in question. It probably isn’t real if you can only see it in one plane and one view.
To put the difference between the two into one sentence: reverberation shows the reflecting tissue (e.g., the pleura) multiple times, mirroring the reflected structure (e.g., a cyst).
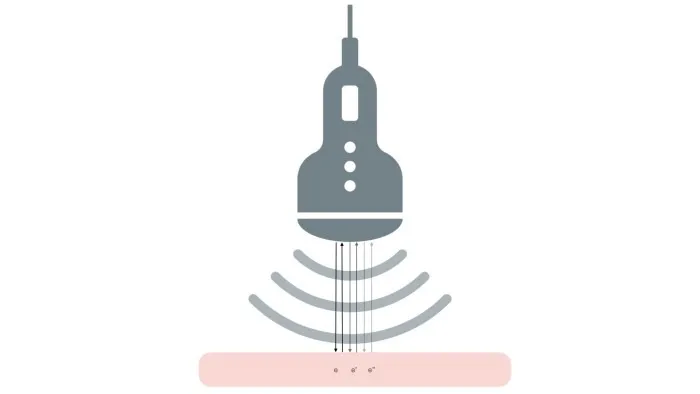

Here you see the principle behind reverberation: in the top graphic, you see one echo (e) being bounced back and forth three times, creating three echos for the transducer to receive: e, e’, and e”. The bottom illustration shows how this might look on your ultrasound screen, with echos evenly spaced and increasing in depth.
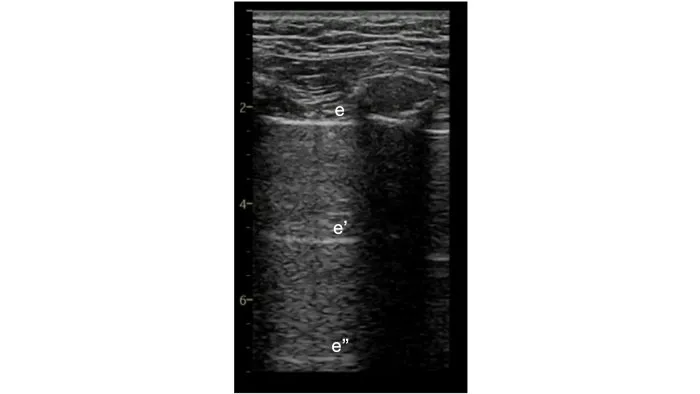
Now take a look at this ultrasound image of the chest. From top to bottom, you will see the chest wall, the ribs, and adjacent shadows, the pleura (marked with an e), and the reverberations of the pleura marked with e’ and e’’.
Air
For the purpose of completeness, I also briefly want to mention air. Sound waves are usually reflected and dispersed at the border between air and the neighboring tissue. This leads to only a few echos returning to the transducer, so we can’t see through air in the lungs or the bowel, for example. You can see this on your screen as an image getting increasingly blurred quite quickly as it goes deeper into the body, and you can’t see any specific structures. It is important to know where to expect air in the body and what it looks like in ultrasound, as a divergence from this pattern can be a sign of pathology. When you see the structure of the lung rather clearly, for example, this can signify pulmonary edema.
Conclusion
You learned a lot about physics and how your scanner “thinks” in this and the previous part. I’m convinced this deeper understanding of the technology behind the ultrasound image will help you tremendously in becoming a great sonographer. After reading today’s part, you should understand that artifacts aren’t necessarily bad and that you can often use them to your advantage in searching for pathologies. It is time for you to return to your scanner and practice telling fact from artifact. The next part will be a bit more practical again: in a short video, we will discuss quantification and your scanner’s features to help you document, measure, and save your findings. Until then, enjoy imaging!