
Ultrasound 101 - Part 2: Image Orientation

Welcome to Ultrasound 101. In this 12-part series, we will talk about the basic principles of medical ultrasound, the equipment you will use, the settings on your machine, and of course, how to use sonography in your patients. Each part will focus on a specific topic and allow you to experiment with the scanner, adjust the settings on your machine, and get the best out of your ultrasound examination.
In Part 1, we talked about your most important tool when performing ultrasound - the transducer and the various types of transducers there are. We identified three different probes most sonographers will use 95% of the time - the linear, the phased array, and the curvilinear transducer. This part will learn about image orientation while using your transducer. Included is a short video. So let's get started!
There are standard orientations when you look at a radiological image like a chest radiograph or a CT. For example, on a chest X-ray, the top of the image is cranial, and the left is the right on the patient. In addition, there are certain conventions for sagittal, coronal, and transverse views in different image modalities, and any image you see will always be in one of these planes.
With ultrasound, YOU hold the imaging hardware in your hand - so YOU are the master of the image planes! This allows you to get atypical views and look at structures from different angles, and it will significantly enhance your understanding of 3D anatomy. But, on the other hand, it means you need a reference point on the image not to get lost - this reference point is called the marker, and it can be found both on your image and your probe:
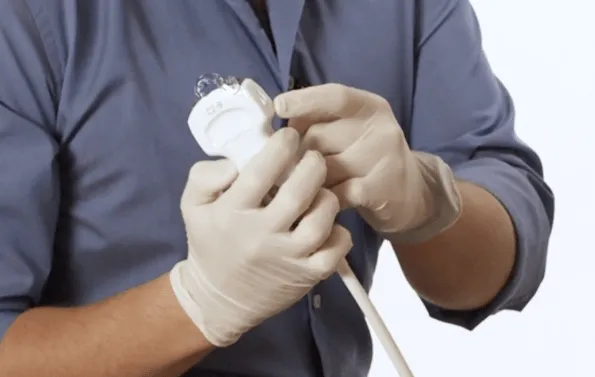
On your probe, the marker is usually a notch or a light. For example, in the image above, you can see it on the side of the transducer.
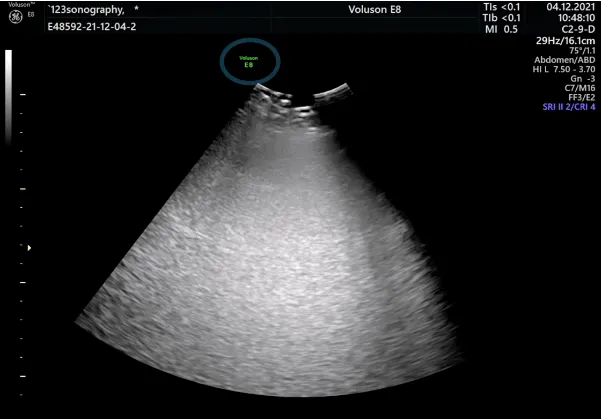
In the ultrasound image, the marker can usually be found at the top of the screen and can be left or right, depending on the preset and the transducer you are using. It is often the logo of the machine's vendor or the scanner itself. For example, in the image above, we circled the marker in blue.
Now, what does this mean? In the image above, the left side of the image is the side of the marker, so this is the area of the patient the marker on the transducer points to if the marker on your probe points to the patient's head, the screen's left side in this setting will be cranial. If you turn the transducer 90 degrees and the marker now points to the patient's right side, the left side of the image will be the patient's right, and so on.
I think it's best we jump to a short video - take a look at the clip we prepared for you, and you will understand the marker much better. After all, ultrasound is all about moving images!
So as you can see, orientation in the ultrasound image is not that hard. It just needs a little practice to get the hand-eye coordination - and that is exactly what I recommend you to do now. So go to your machine and start to practice on your colleagues, your patients, or even yourself. Next time, you will learn about the three basic transducer movements - sliding, tilting, and turning. Until then, enjoy imaging!
Related Courses

Our Echo Pass includes 90 lectures from different echocardiography courses and is the perfect…

This subscription, tailored for radiologists, provides comprehensive instruction on imaging…