
Ultrasound 101 - Part 5: Gain and time gain compensation

Welcome to Ultrasound 101. In this 12-part series, we will talk about the basic principles of medical ultrasound, the equipment you will use, the settings on your machine, and of course, how to use sonography in your patients. Each part will focus on a specific topic and allow you to experiment with the scanner, adjust the settings on your machine, and get the best out of your ultrasound examination.
What we learned so far
You already learned a lot about imaging hardware and how to set your depth correctly. This time, we will talk about the second most important setting when imaging your patients - gain and time gain compensation.
What is gain?
Gain is the amplification of the ultrasound signals your transducer records. Each echo gets turned into a lighter or darker (depending on the echogenicity) pixel on your machine's screen, and gain dictates how much each echo is amplified. If you turn the gain all the way down, you will have a very dark image and will have a hard time making out details. Turning gain all the way up, on the other hand, shows a lot of echos you wouldn't usually see, a lot of artifacts, and again makes it harder for you to see properly. In both extremes, you also lose contrast. Gain is quite similar to the volume you set on your stereo's amplifier: if you turn it all the way down, you will hardly hear a thing; if you crank it all the way up, you will hear mostly noise, but sound quality hardly benefits from it.
Why you have to adjust gain in every patient
As each patient is different, each ultrasound examination is different. In a very slim patient, ultrasound can penetrate the body easily, and you will get back a lot of echos. In an obese patient or one with emphysema, physics are way different, and overall, you will not get as many echos - image quality will be worse. This also depends on the transducer you use, the organ you want to image, and the area you are in (e.g., if there is a good acoustic window or not). For example, when imaging the lung, you will usually need a lot of gain to make out the pleura and lung tissue, but when looking at the urinary bladder, you will turn gain down a lot - if you don't, you will only see a lot of echogenicity within the bladder, making it harder to make out borders and actual solid structures (such as urinary stones or sand, for example).
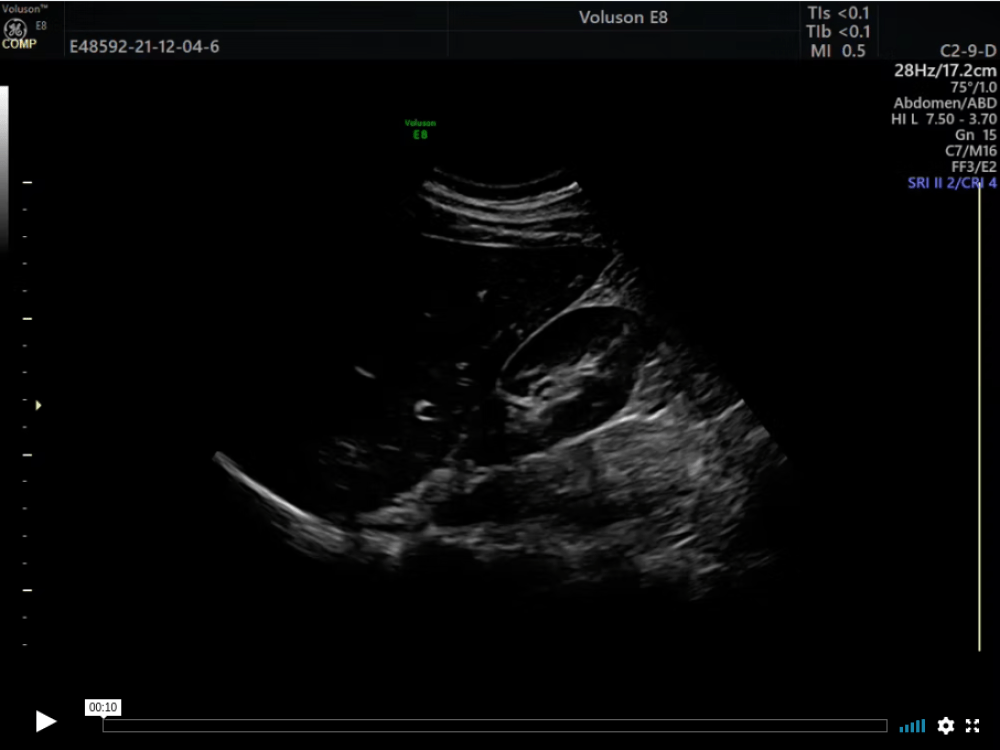
Take a look at this first image - you have to believe me that this is a view of the liver and the right kidney, as you can't really see anything because the gain is way too low. You can really only see the bright echo of the diaphragm in the bottom left corner.
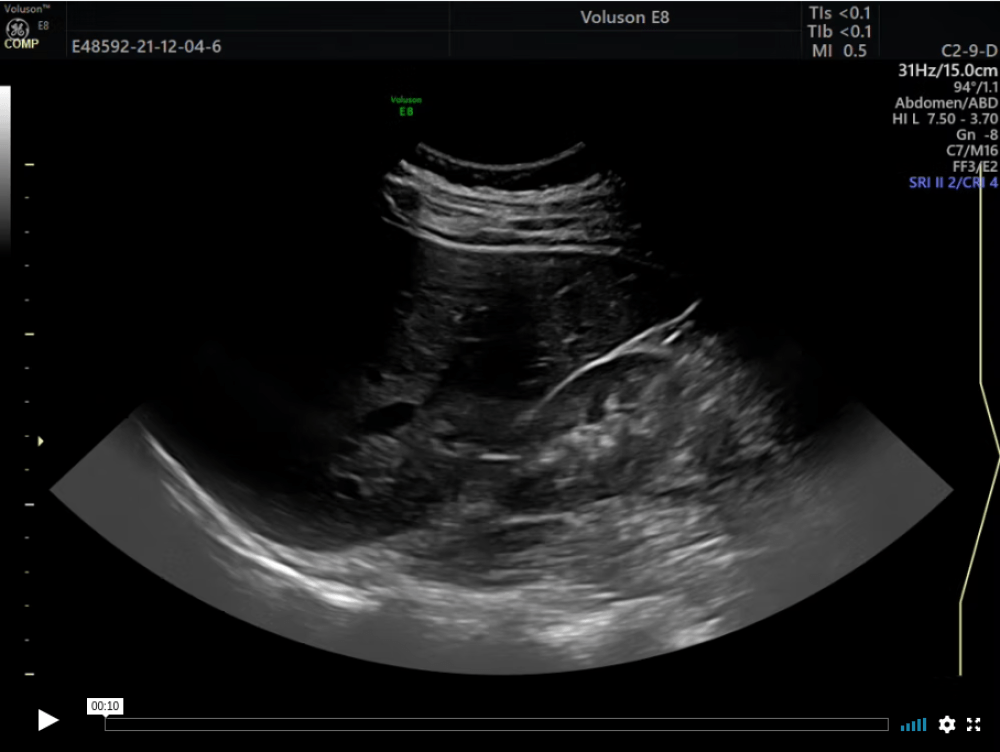
In the following image, you can see the other extreme - gain is set too high, and while this image looks quite nice at first glance, you'll notice that you are losing details as well:
Here we have a hard time telling where the border of the renal pelvis is, and you also cannot see all small vessels in the liver, as they are over-gained.
Now in this third image, gain settings are optimal - note how you can tell the structure of the kidney, see vessels in the liver, make out a lot of details from the texture of both organs, and clearly distinguish them from the surrounding tissues.
How to set gain
With time and experience, you won't think much about gain but just do it intuitively, but in the beginning, the rule is fluids should be black. There is always some fluid in your image - blood within a vessel, urine, bile, etc. - and you can use it as a reference point for your setting. This is usually one of the first two things I do after placing the transducer on the patient's skin - I set the gain, and I set the depth. Once fluids on your screen are black, you can fine-tune by checking if you can distinguish different layers of tissues, make out small vessels or see echos where you don't expect any. The gain setting makes a huge difference in imaging ability, and you can immediately tell a skilled sonographer by looking at their images with respect to gain. In the following loop, the gain goes from very low to very high so that you can see the difference.
Time gain compensation
Until now, we only talked about the overall gain four your images, and that is where you should start, and this is also what everyone refers to when they say "gain". But not every part of your image needs the same amount of amplification: maybe you have some acoustic enhancement in the far-field, or there is a structure in the middle of your image that you need to see better (like a valve in the heart, for example) - this is what time gain compensation, or TGC, is for.
TGC tries to counter the physical principle that echos decrease the further your ultrasound beam travels through the patient's body. The more energy the soundwave needs to go in and out again, the weaker it gets, and thus echos in the far-field are usually weaker than those very close to the skin. Modern scanners compensate for this automatically and display a smooth image but still allow you to make adjustments for your individual imaging needs. TGC is set using physical or virtual scroll bars that mostly can be found at the edge of your screen or cockpit:
In this image, TGC is set to be the same throughout the image.
With this setting, you will get less gain in the near-field (at the top of your screen), medium gain in the middle, and a lot of gain in the far-field.
Here's a video of the liver and right kidney again to put this into practice. This time the overall gain is left as it is, and the TGC in the far-field is turned up and down. Again, look out for changes at the bottom of the image!
Your turn
So this concludes today's part, and I hope you have a better understanding now of why gain is so important and how to avoid an over- or undergained image. You now have all the tools to practice a complete exam - you've learned which transducer to pick, how to orient yourself in the image, and how to set imaging depth and gain correctly. It is time for you to head back to your scanner and practice this until you get a good feel for it, and remember - fluids should be black. Next time, we will deal with optimizing your image even further, because sometimes you have all the right settings but still don't see everything you want. So stay tuned and until then, enjoy imaging!