
Ultrasound 101 - Part 1: Transducers

Welcome to Ultrasound 101. In this 12-part series, we will talk about the basic principles of medical ultrasound, the equipment you will use, the settings on your machine, and of course, how to use sonography in your patients. Each part will focus on a specific topic and allow you to experiment with the scanner, adjust the settings on your machine, and get the best out of your ultrasound examination. So let's get started!
This first part is about transducers. The transducer, or probe, is one of the - if not the - most important part of your ultrasound machine as it emits and receives the ultrasound waves that travel through the patient's body. The transducer plays a huge role in image quality and is one of the most expensive parts of your ultrasound system, so they should be cared for well: don't drop them, don't kink the cable, and don't scratch the surface while cleaning it.
Transducers come in different shapes and sizes, depending on the sonographer's needs. Here you see a standard set of ultrasound probes - from left to right a curvilinear, a linear, and a phased array transducer. We'll talk about them in detail in a few seconds.
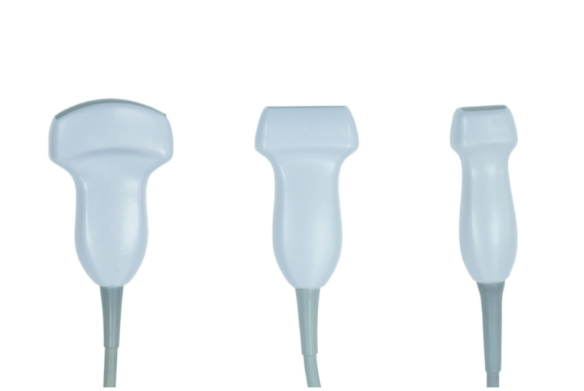
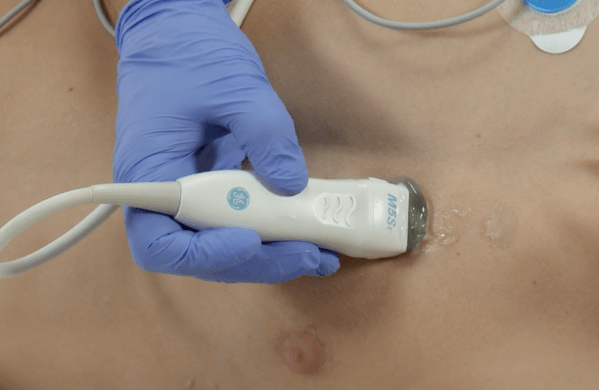
You will find at least the first two on most machines you come across during your training; the third one is mainly used for echocardiography and is often not present on surgical wards, for example. But depending on your clinical setting, you might encounter even more probes - for example, this is a set an OB/GYN specialist might use in their office:
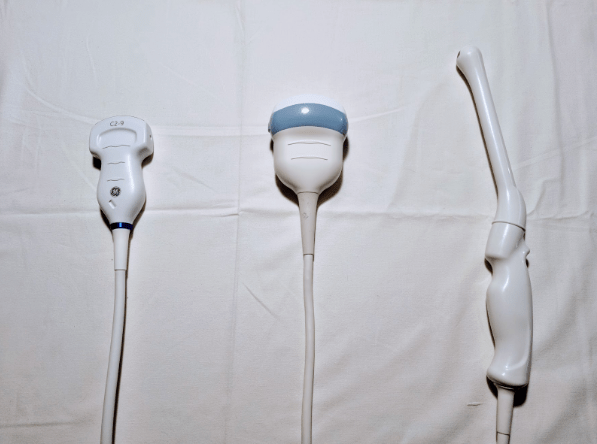
You again see a curved array transducer, a 3D probe, and a transvaginal ultrasound probe. Other special transducers include the trans-esophageal echo probe, shaped like an endoscope, or the pencil probe used in echocardiography. For the beginning, let's focus on the first three probes, which will be used in 95% of cases.
The curvilinear transducer
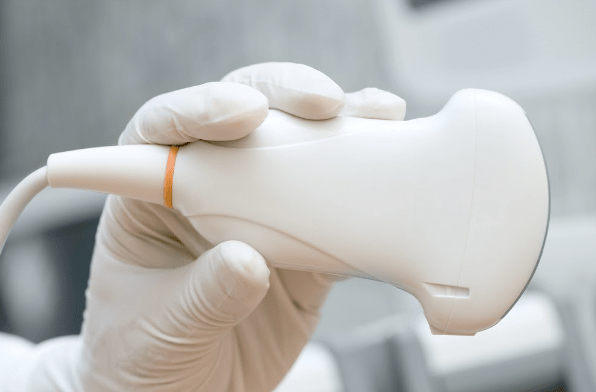
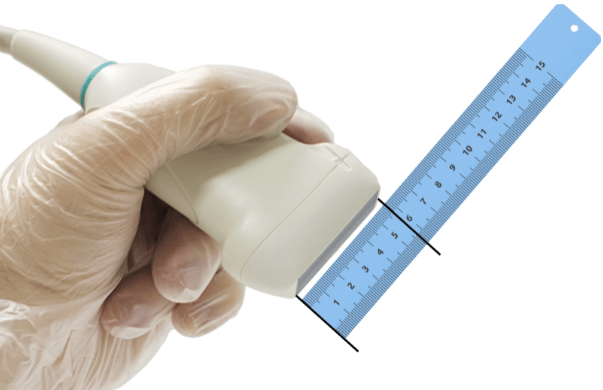
This is a great allround device and is usually the first transducer you hold when you start imaging in your career. It has a rounded and relatively large footprint (this is the part that touches the patient's skin) and thus gives you a large sector of imaging because the ultrasound waves fan out from the transducer.
The advantage of this is that you can image an area larger than the footprint/transducer itself because the sector gets wider as it travels into the body, which is illustrated in this graphic:
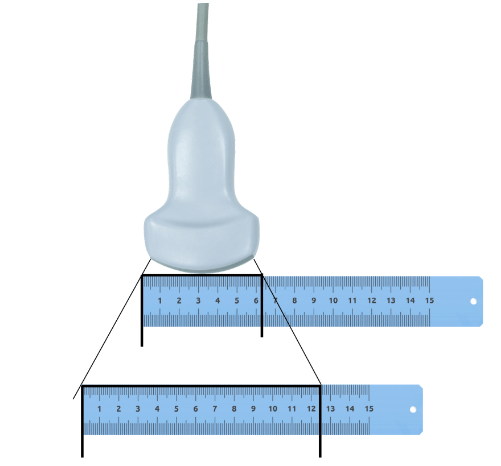
On the other hand, it is still the same amount of image lines at the very end of the image as it is close to the transducer - which means that the space between two lines increases in the so-called far-field, making lateral resolution there worse.
To demonstrate this in a patient, here is an image of the upper right quadrant of the abdomen, where you can see the liver and the kidney, the psoas muscle, and the spine at the bottom. Note the shape of the image and how quality decreases in the far-field, but still - you can see a lot of details with sonography.
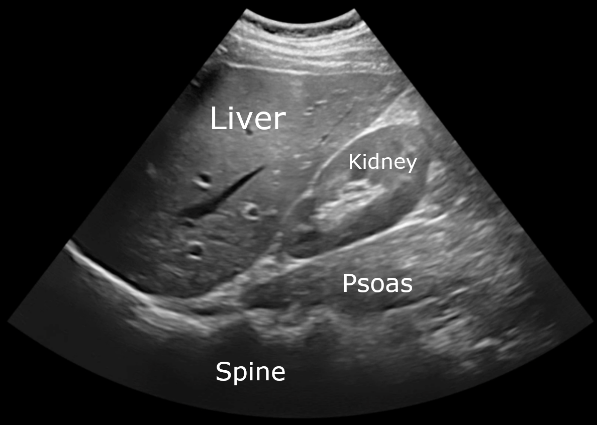
Of course, line density is not the only aspect of image quality - the further ultrasound waves have to travel back and forth between the probe and the structure you're imaging, the more energy they lose, and the more waves get lost; thus, less information can be processed by the machine. You can adjust some settings on your scan
The linear transducer
There are some cases where you don't need a large sector to scan, for example, when the area in question lies very superficial or is quite narrow itself. In such a situation, it makes sense to use a linear transducer that emits only parallel ultrasound waves, allowing for the same resolution in the near-field and the far-field. Linear transducers are used for musculoskeletal imaging (MSK), imaging certain vessels like the carotids, and ultrasound-guided procedures like placing a central line or a nerve block in regional anesthesia. Thyroid ultrasound is also done with this kind of transducer since the thyroid lies directly beneath the skin.
The image of a linear transducer can be immediately recognized because it has a rectangular shape. In this case, we imaged the neck of a patient to see the carotid artery (CA) and the jugular vein (being a little compressed right above the carotid artery). This is a classic view for anybody working in intensive care, emergency medicine, or anesthesiology, as it is used for placing a central line.
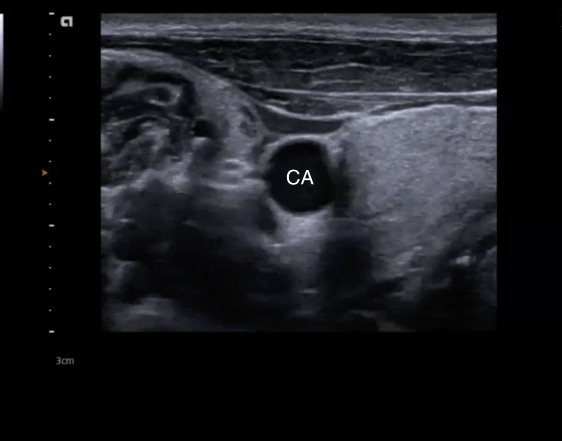
Note all of the details we can see with the linear transducer. Since the imaging depth is only a few centimeters (this is due to the frequency, we'll talk more about this in a bit), we see many details of the neck muscles, the adjacent thyroid gland, and the vessel itself. Still, the depth is only 3 centimeters (seen at the bottom left of the image).
The phased array transducer
The last transducer we want to talk about is the phased array transducer, also called echo probe. It is mainly used in echocardiography and thus optimized for this field of use: it has a minimal footprint to be able to image between the ribs, has quite a high penetration depth to be able to show the whole heart, and high temporal resolution (i.e., frame rate) to depict moving structures such as the valves perfectly.
The image we get from an echo probe is similar to the one from the curvilinear transducer in that the soundwaves fan out, but due to the small footprint, their origin is very narrow. You can appreciate this in the following image.
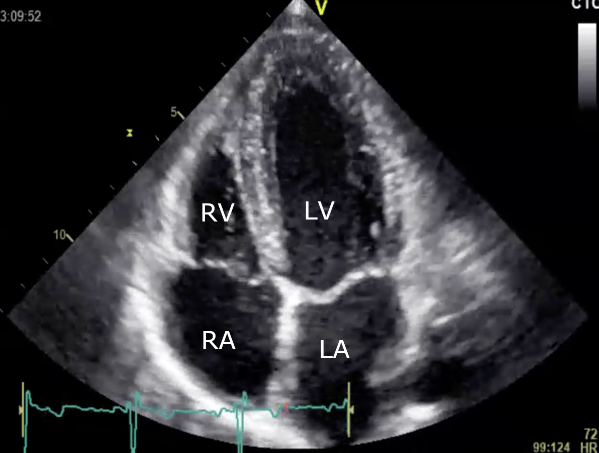
This is a 4-chamber view of the heart. At the very top of the image is the apex with the left ventricle (LV), then the mitral valve and the left atrium (LA). On the left side of the image, you can see the right atrium (RA), and the right ventricle (RV) above the tricuspid valve.
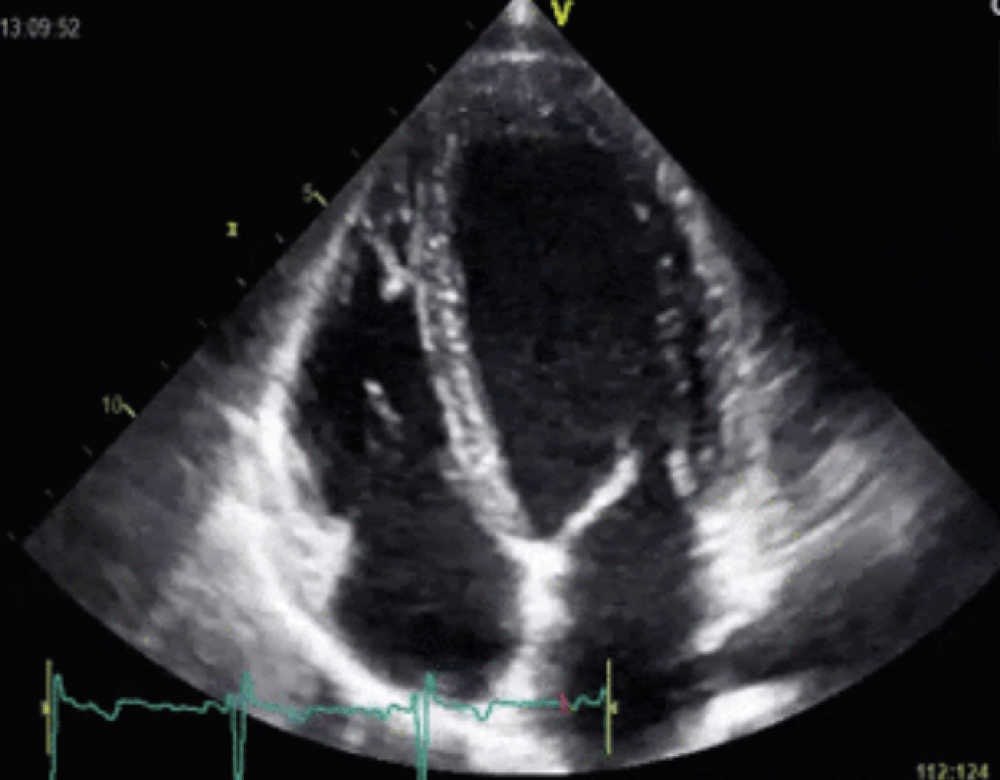
Now look at the video of the same view, and you can appreciate the importance of a high temporal resolution - frame rate - as this allows you to see the heart pump, the motion of the wall and septum, and the valves opening and closing.
Imaging frequency
Transducer types don't only differ in the shape of the ultrasound image they create but also in the range of frequencies they can provide. For example, a curvilinear transducer has a relatively low frequency. This allows the soundwaves to penetrate deeply into the body and display structures that are as deep as 25 centimeters or more because low-frequency waves carry pretty well (you might have experienced this phenomenon also when your neighbor likes listening to bass-heavy music). But the deep penetration comes at a price - the overall resolution, i.e., the number of details that can be displayed, is lower than in the linear transducer.
The linear transducer uses a pretty high frequency that penetrates only a few centimeters (depending on your machine, about 7 centimeters is usually the cut-off) but therefore creates spectacular images in the near-field. For example, you can look at the composition of the carotid wall or the integrity of the patella ligament with a linear transducer in a level of detail that might even save your patient an MRI in some cases. You also get a very high temporal resolution, allowing you even to see blood flow in slow-flowing vessels like the jugular vein.
The phased array probe's frequency is sort of between the two - it has a narrower sector than the curvilinear probe, saving computing power for an increase in temporal resolution and imaging depth (compared to the linear probe), which is so essential in an organ that moves as fast as the heart but is also more than 10 centimeters large. As you can see, there is a lot more to a transducer than just its shape and footprint.
So, in conclusion, the transducer is your most important tool when it comes to performing ultrasound, and you now know which one to pick for the examination at hand. Take a look at the transducers you have on your machine and think about what kind of exams or procedures you can do with them or would like to do. In the next part, we will talk about transducer and image orientation using the marker, and standard views in ultrasound. Until then, enjoy imaging!